Saving the World or Die Trying

Evan and I watched the film, “Back to Eden” last year and we were immediately struck by the difference we could make to our environment in our own backyard.

Back to Eden gardening mimics the natural way the forest grows. We hope that by using this method we can support insects, sequester tons of carbon (and I mean, tons), and of course, grow healthy things to eat.

Before we can get to gardening we have a lot of work to do with the soil. Like, we gotta get some. While we could ship in 10 yards of dirt tomorrow… what’s the rush? While it will take time, our compost will have an unmatched quality to anything we could buy and also: free.

I chose hogwire (you know I love my hogwire) for the compost rings. This is a common composting practice but new to me …. with a whole lotta YouTube and reading it wasn’t too hard to get started.

There were plenty of leaves to work with in the fall but those quickly ran out. We formed a relationship with our neighbor to take manure and some hardwood chip horsing bedding.

She was glad to get it off her hands. Our Bichon Maisey is not sure about her tractor though. Reaching out for something like this is on the edge of our comfort zone, but naturally, the back-to-Eden process calls us to come together and it has been fun to connect. So glad we did.

It took us about three tries with the rings to get the formula of carbon and nitrogen just right. Adding our neighbor’s animal product was the secret sauce. It’s incredible how quickly the composting is heating up. If you want to know more about how to do this I’m happy to share my resources with you.

Keeping up with turning compost piles is a highly laborious job. We were going to need some backup. I mentioned we weren’t ready for last year’s snows (dug out by another gracious neighbor.) Anyways, we are going to be prepared now!

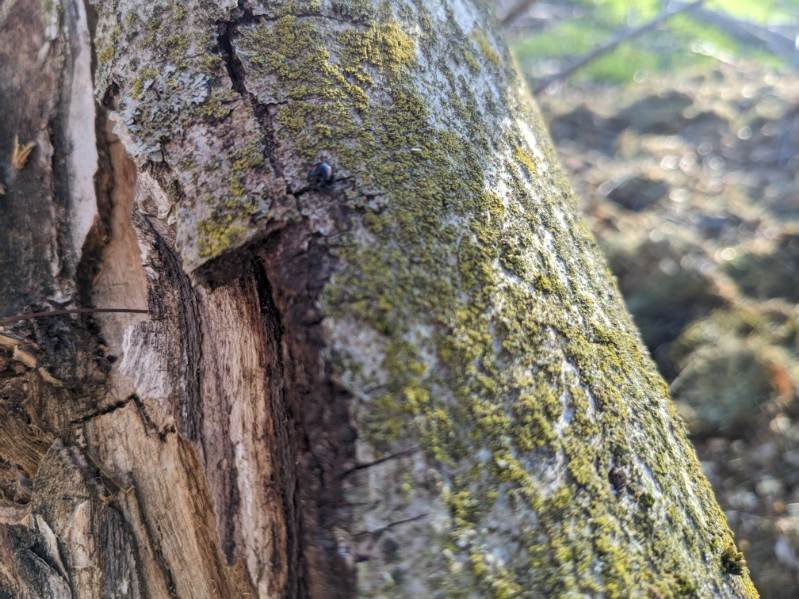
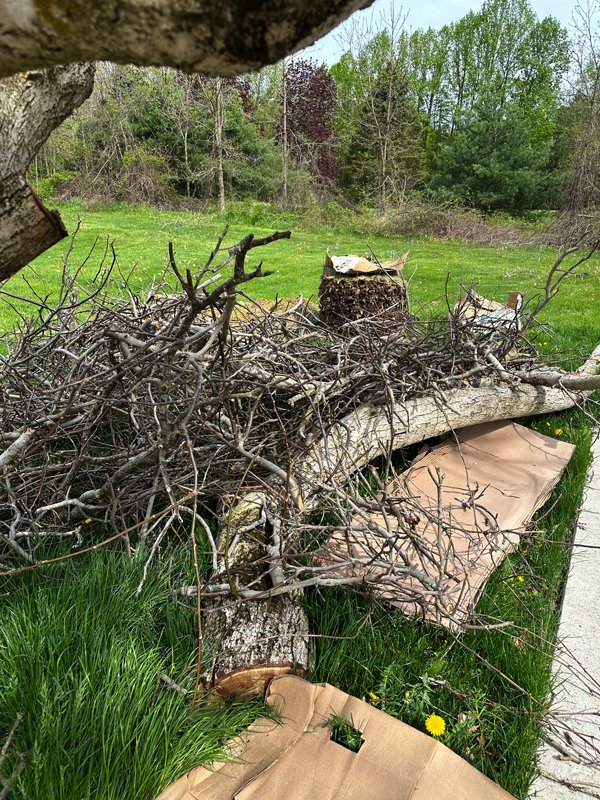
It’s a good thing because there are other big problems looming. While I don’t think the photo does it justice this tree has been threatening the life of everyone around it and our home so it was time to get going on that.

I cannot count the number of issues this tree has caused. We hoped we could inoculate a few branches for mushrooms but the tree was already covered in another fungus. Adding other spores would compete and likely lose.

Pretty though. Back to the earth, it goes. It will make a great chip for the garden.

I think I’ll sleep quite a bit better too. If this looks like a ton of work. It is.

We aren’t the kind of people to back away from a challenge.

Save the earth or die trying.


Kirbi


P.S. Did you see my article on Muddy Colors about The Art of Green? It’s about how I approach using nature's most dominant colors.


More Pooh Bear....

When you have a long-time friend, each milestone is I think, all the sweeter. My Auntie heart is full these days, my sweet friend from kindergarten is having a boy! Here is, yes, another one of my quilts, and yes - Pooh themed again! Pooh was one of our favorites growing up and I was perfectly inspired to give a Winnie the Pooh theme quilt another go.

(If you missed my other Winnie the Pooh Quilt check it out here)

My friend, a dedicated athlete was known for wearing mismatched socks. Didn’t matter if it was work or a race. This quilt I wanted to have a charming, cozy, mismatched quality. Whatever yellow outfits pair with this quilt are going to match and be versatile for the nursery. A great backdrop for the gazillion pictures for the pictures they can send to Aunt K.

I peppered some nudes/neutrals into the yellow. I think this will help it feel less “Maize Yellow” …though, this U of M fan Mom-to-be probably wouldn’t have minded. We I both like gingham, so I didn’t shy away from the print in different various.

When I do a “random” pattern, it’s never really random. It feels similar to painting a star-filled sky, it can be tricky to look natural. I spend however long it takes to arrange the colors. I’m easing going about it. Maisey regularly runs through my layout so I’m open to having the pattern evolve in the process.

I find it’s a little easier to manage things in large chunks. By creating the four block squares, I can continue to switch around blocks. The bigger the blocks become the less flexibility in the pattern I have. To me, this feels natural and more playful than taking it row by row. I think my corners turn out better too.

Squares make a simple quilt, not the most technically difficult but the small size squares, the hand stitching and color scheme, result in what I thinks is a sweet and old-fashioned look. Two needle at a time? Why not. I load up 4 needles and go through those twice in an evening sitting.

Here is how it looks after the wash perfectly wrinkly-soft.

I went with more gingham for the back. Baby blue back for a baby boy…. I bought this particular gingham in a large quainty because it works so well for baby boy projects.

Hope your day is as carefree as a walk in the hundred-acre woods.

Keep heart,

Kirbi

VLOG - Reflections from a recent school visit

Enthusiastic staff from Scripps Middle school are pictured below. The teacher center was so enthused during my presentation she ran out to print posters of a quote for me to sign! I thought it was fun idea. When I got home I was thinking a lot about the young people I’ve had the pleasure of meeting lately and I wrapped up some of my thoughts in the video - cliff notes, parents (and teachers!) I think you are doing a great job.

Snow and Stitch scrolls...

I heard chickadees outside today. In the summer months, I realize I might not stop to appreciate their “fee-bee” whistle, but hearing this sound in the snowy quiet, was bright and clear.

Despite the birds, it’s very routine here in the studio, I’m up early working on art and I crank through the day with Maisey at my side. In this wet weather, Maisey and I have come to enjoy what we call a “suburban walk.” We walk on the cement pad from the front to the back deck so she doesn’t get her paws wet. She’s something else this one…. but it gets us out and breathing the fresh air.

I said on Instagram that we were not prepared to deal with the snow at our new place. Thankfully, thankfully, our neighbor with a John Deere plowed us out, not once but twice! We feel quite welcomed out here. I will say, I miss talks in the dark night chatting with our former neighbor - shout out to Martha!

As some of you know, Evan and I moved out of the suburbs and are building a small scale homestead, which begins with rehabbing a 1970s ranch. The ongoing construction inside the house is dirty, cluttered, and slightly dangerous… I feel like either Evan or I get a “it will be worth it” pep talk once a week. The cold is slowing us down as it’s hard to use saws even in the garage at these temperatures. We will hibernate for a little bit longer…. there’s certainly plenty to draw on my desk in the meantime.

I planned to put away my sewing machine for a bit while the dust settles, that’s until a friend of mine announced her pregnancy! Obviously, the Juki is coming out of storage and on to the kitchen counter - I’ve got a baby quilt to make! Even still, l need something fun and compact to work on in the evening when we are cooped up that won’t be too much of a mess … and so, I began a meditation scroll.

The mediation school, or snippet scroll concept is simple. Two layers of fabric: the bottom strip and the scraps on top. If you follow my projects you may recognize pieces of my mini quilt coral/purple ombre that Evan accidentally set on fire… It lives again! On the top layer, the little scraps can be basted down or stitched down on as you go. For the bottom strip, I’m using a jelly roll. It’s 2.5 inches wide but I don’t see why we could do a scroll at any size.

I love this as a way to keep meaningful fabric, clothes, or swatches. Some people use the scrolls to cut apart and use for journaling embellishments or decorations but I think it can be just for the act of stitching practice and play.

Stitching for stitching sake! Loving these meditation scrolls for sitting in front the t.v. at night, I can really fly down the strip! (Though that might not be the point… LOL)

Ideally, you’d fasten them onto to a spool and roll them up. I happen to have a few large wooden spools I want to use, where are they? What box? It could be a while friends…

If you have any bit of inspiration to make a scroll, I invite you to join me and please send pics!

I’m trying to keep the sewing explosion contained among the wreckage of the remodel. Whatever the heck I’m making on my Living Canvas is in its “ugly stage” no doubt. It’ll all be worth it. <3

More soon.

P.S. Seriously - consider joining me on the scrolls!