Posts in Textiles
The Organic Quilt Part 2

LINKS TO YOUTUBE:

Part 1

Part 2

Part 3

Part 4

Part 5

Bonus Variations

In Part Two, we will cut the first “wave” of the fabric and pin them together.

Step One: Cutting

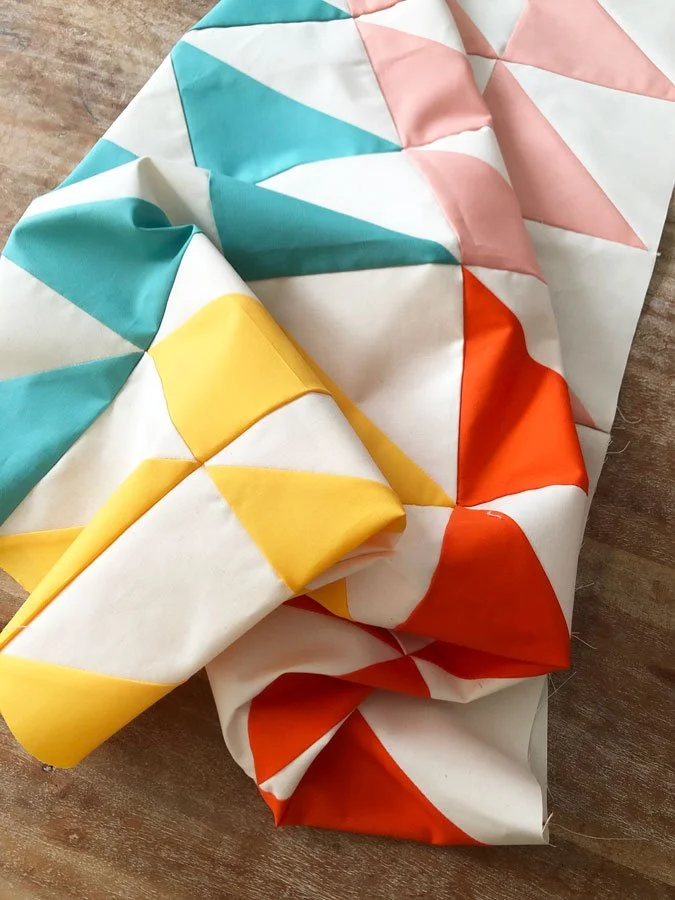
Lay your fabric on top of one another as I do in the video. Both fabrics should face “up.” Cut into both layers using your rotary cutter.

Take your top wave and lay it over your bottom fabric as if you are “folding” it. This will give you the right sides facing each other. This feels awkward the first time you do it and you will see below how it doesn’t look like they will line up, but they will I promise! The first time I had to do a few “wrong” before I got it right.

Place pins along the edges. It may be helpful to pin each side first, then the center, then the spaces between. Bring the lows of the “valleys” to the top point of the “hills” Use as many pins as you need. Unlike other curved pieced quilts, this doesn’t have to be exact for it to turn out great.

Let’s sew these together and free flow! Join me in Part Three.

Best,

Kirbi


The Organic Quilt Part 1

LINKS TO YOUTUBE:

Part 1

Part 2

Part 3

Part 4

Part 5

Bonus Variations

I love quilting (can you feel the “but” coming on?) But… sometimes I want to work with my sewing machine, with a playful approach. For me, that means less measuring! I also do not like to pause at certain stages of a quilt project as all the information and numbers are fresh in my head. I wished there was a quilt project I could come and go and play as I pleased. So I came up with… The Organic Quilt.

The Organic Quilt Pattern is more of a technique than a pattern. Some quilters may call this improv or freestyle quilting. There’s less need for exact accuracy and more room for creativity. The technique creates subtle waves and I chose soft colors to match. Each Organic Quilt is 100% unique from color choice to design. Ready to give it a try? In Part One, I outline my supplies and inspirations.

Skills required:

This quilt requires you to sew curves and do basic quilting methods (binding, basting, quilting, etc.) However, in my videos, I cover every step. It requires overal less precision than most quilt patterns which makes it great for all levels.

Supplies:

Quilt top: 3-6 of your favorite cotton fabrics, how much is up to you, and how big your quilt is going to be. I recommend buying one of your fabrics in a larger quantity and a smaller quantity of the rest of your colors fabrics. This will ensure your quilt has a dominant pattern/color that will help the overall harmony of the fabric you choose. I used a total of two yards of fabric for the quilt top that I made at 54x6. I also used solids and patterns for a twinkle of fun.

Quilt back: You will need the same yardage for the back of the quilt in a single pattern/color. I had to sew two pieces together to get the size large enough for the back of the quilt. Don’t worry about this is barely noticeable!

Batting: How heavy do you want your quilt to be? I used: Warm and White

Thread: I use Aurifil for all my machine work.

Sewing Machine: I drive a Juki

Other supplies: Rotary cutter, self-healing mat, fabric scissors, walking foot.

Ready? Let’s get started!

Join me in Part two for more!.

Best,

Kirbi


Triangle Color Blocks For Baby

Hello from Stag Studio!

I spent the weekend sewing through the winter storm and I’m sharing a quilt FAIL that taught me a whole bunch and gave me new inspiration.

First, the quilt fail - it was my first time using gauze. Soft, delicate - I had to try it. I buy my fabrics locally and not one of my go-to stores had gauze. When I finally got my hands on it and finished the project, I learned it requires a top stitch, not a traditional edging. Below, you can see how after the wash the gauze shrunk and pulled away. I had anticipated this so I used a zigzag stitch but even so, it was fray city! I should have listened to Melanie Ham!

It can be a bummer when a thing doesn’t turn out but I’ve ruined so many paintings and drawings, I know that it’s a part of being creative. An instructor at art college told me, “you will learn more by finishing something than starting over.” I don’t abandon projects, I always use the rest of the project to practice and learn. I’m a finisher. The good news is, that when I make big mistakes like this, what I learned sticks with me.

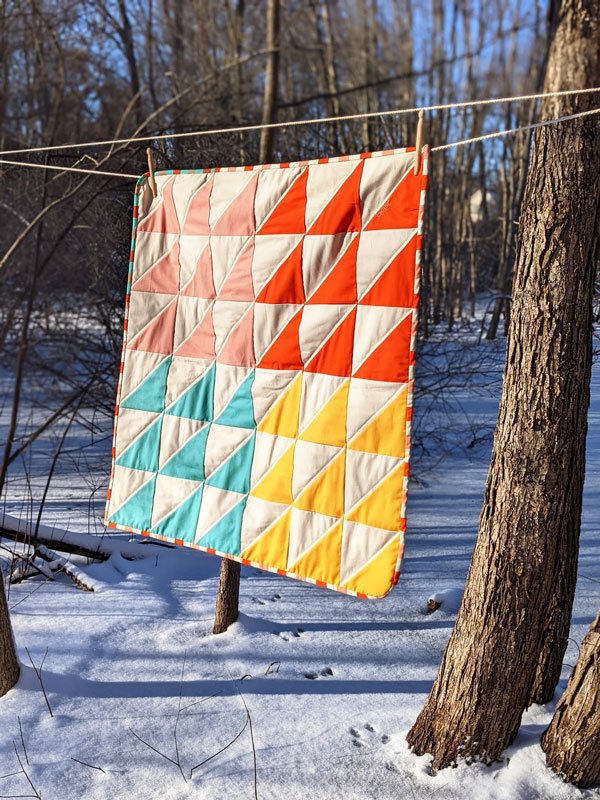
The blanket plopped into the scrap pile but I still wanted to complete a project with the colors I was working with. I was planning to make a quilt for a friend’s new babe and decided to use the same colors. I bought my fabric in solids and quickly decided on triangles. Jotting down a pattern for myself - the cutting and sewing became straightforward.

The triangles look modern, especially in bold colors against the cream. Still, the piece has that “quilted” feel. The color blocking also enhances the mod look and I think looks perfectly playful for baby.

I quilted using a golden thread, bravely sewing on the diagonal. Admittedly, this was a last-minute choice - no regrets!

A part of this quilt that may be overlooked is how I used rounded corners on two sides of the quilt. It created a swath shape and enhanced the "mod” feel of the quilt.

Stay warm out there snow bunnies!

Sending smiles,

Kirbi

Living Canvas Collection: Five Special Dolls

Dear Readers,

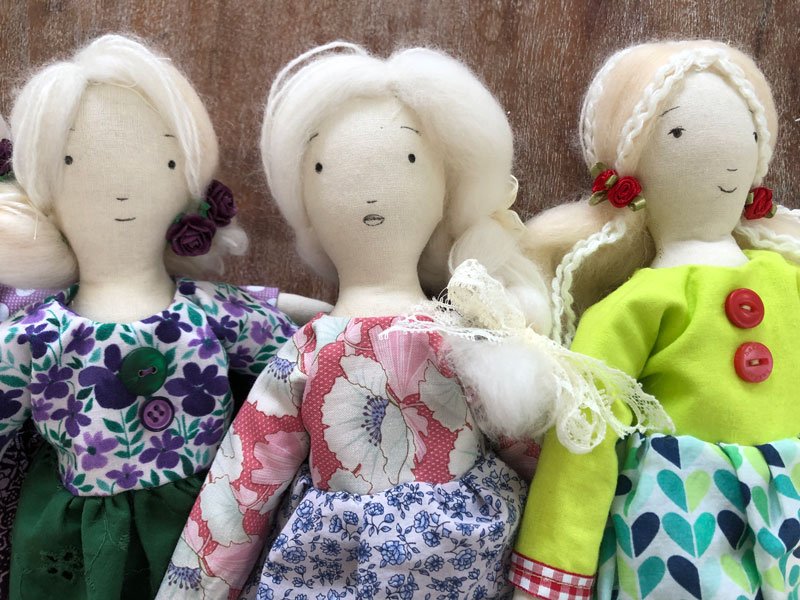
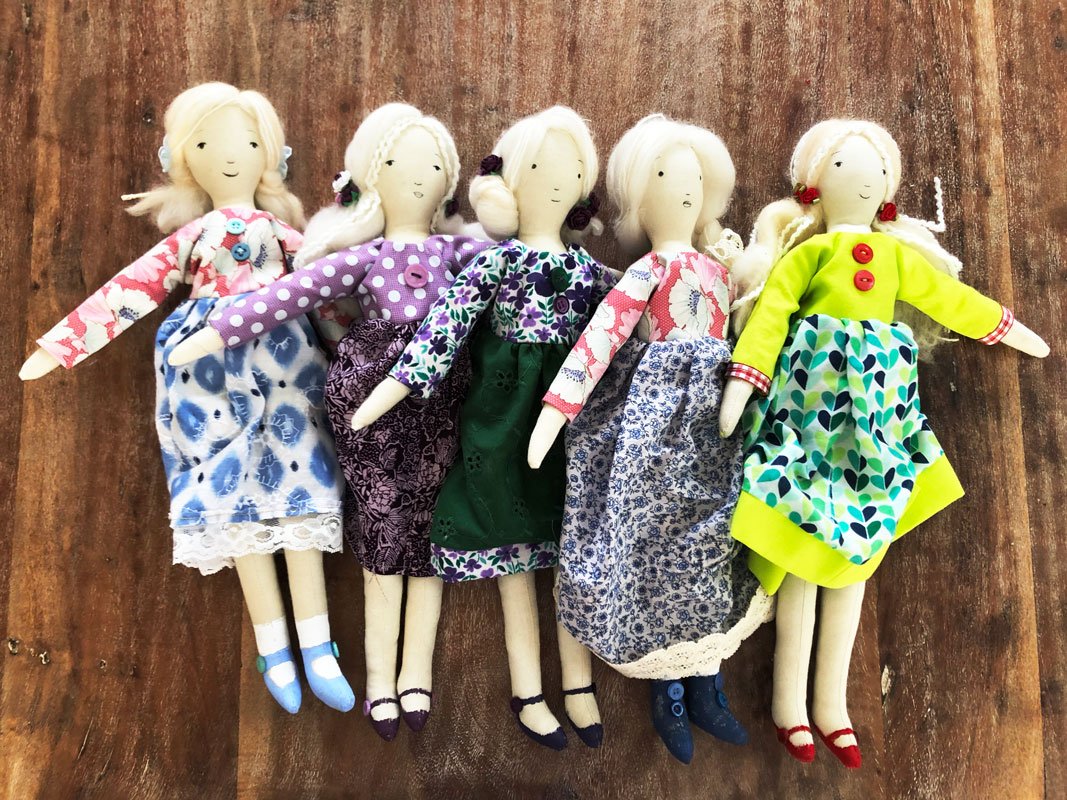
Over many years creating art, I tried to keep my crafts, like knitting and beading separate from my illustration work. In fact, for a long time I didn’t even keep the supplies for my “crafts” in my studio. But then I got more hobbies, miniature gardening, quilting, doll making, paper crafts… the list goes on. I threw my hands up and realized my whole life is a canvas. Whatever I make, I bring a touch of creativity to it. This project I’m sharing today brings together sewing, pattern making, drawing, color theory… and most of all MY HEART! <3

My husband’s beloved grandmother, Millie, passed away late last year. Due to my health situation I had to remain home for the funeral - it was painful not to be together, a feeling many people are familiar with during these times.

Millie’s story is one of insurmountable strength. She traveled by herself with two littles by boat to the US - it’s only the beginning of her amazing story. My father-in-law brought me back some of Millie’s clothes, knowing I may enjoy the fabrics for my sewing projects. I immediately wanted to make a doll for each of my aunts using Millie’s clothes.

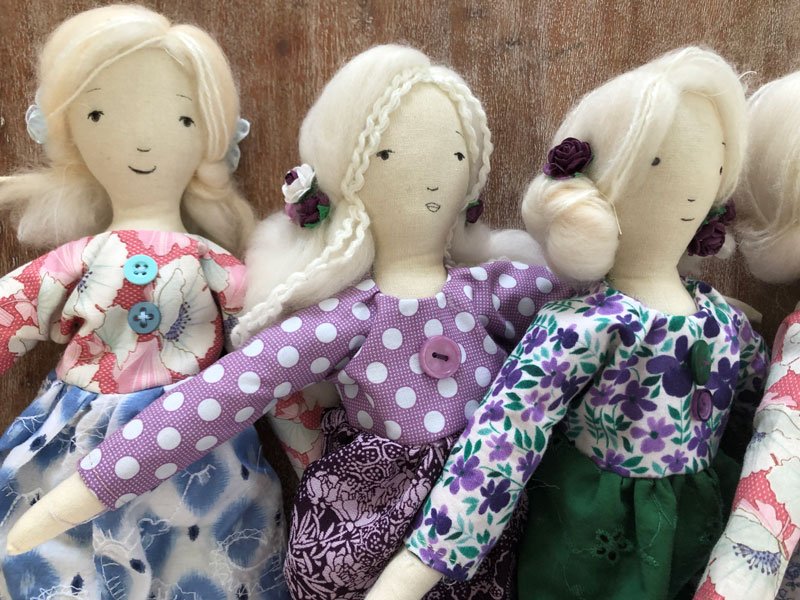
The colors of the clothes were eclectic so I had to put on my thinker to figure out how to make cohesive outfits for the girls. Each dress turned out so different so I thought their faces should all be unique too.

I draw on the faces before the dolls are stuffed with a small fine tip pen.

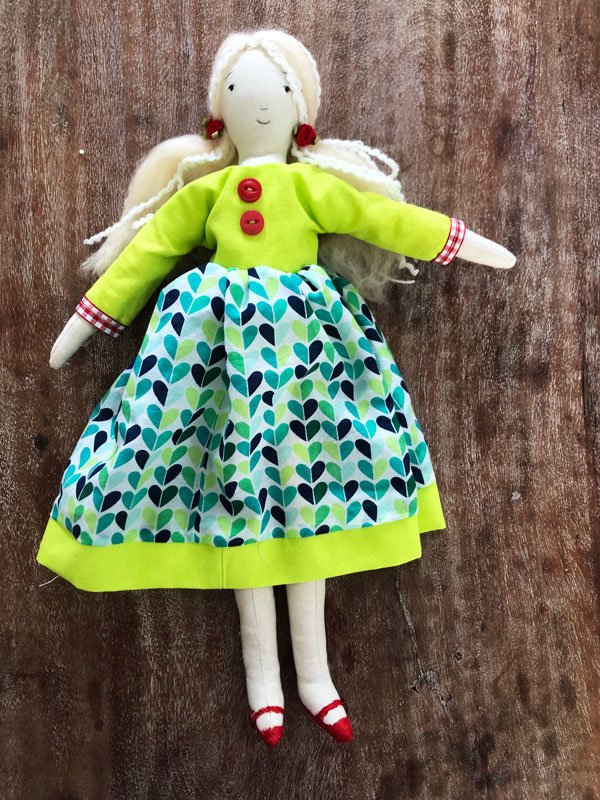
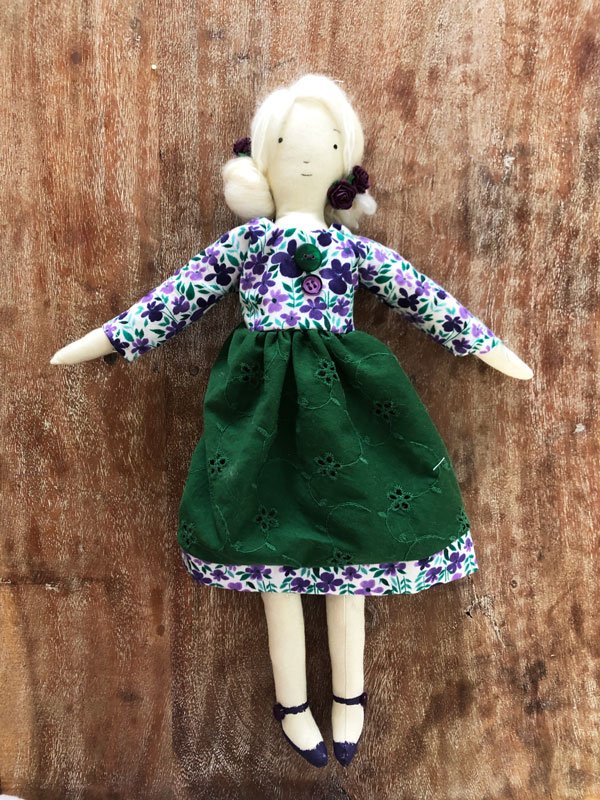
My Mom and I decorate and rearrange a lot. It’s something I’ve done with her since I was little. One of our theories is that if a color isn’t working, sometimes you just need MORE of it… The red and green combo I was most worried about. I used our theory, and added MORE. Like most outfits, it starts with a great pair of shoes.

Red on the edges, red buttons, red roses —it snapped together. This idea I now know is called color harmony and repetition but I learned about it long before art school.

Is there anything quite like finding the perfect accessory? I found this jewel-y green button in a bag of 1500 buttons I bought. Yep, I’m the kind of person that buys 1500 buttons. Out of boredom that comes with pandemic life, I asked Evan if he’d like to sort the buttons with me. I got turned down (LOL) but I hey, I found this button! Doesn’t it look so with these colors? It ties in the green and purple nicely.

I wanted to bring as much meaning into the dolls I could. I carefully pulled off buttons of Millie’s shirts and sewed them in the hair here, using every bit of the clothes I could.

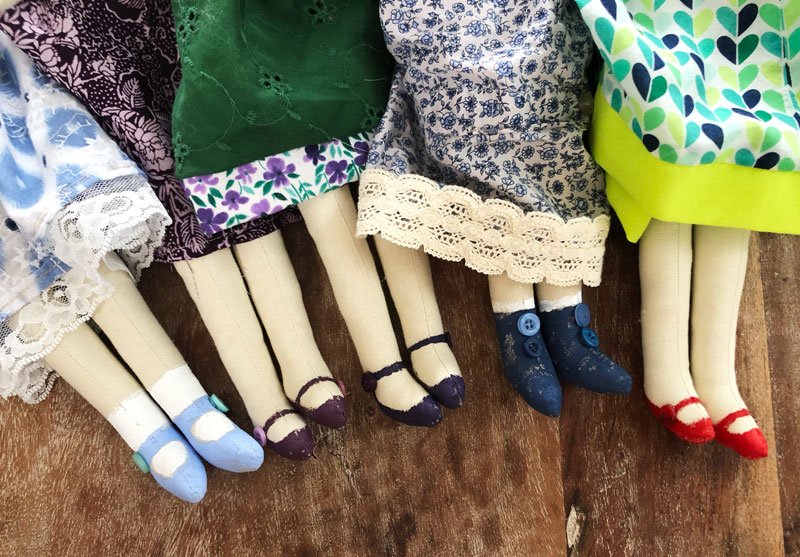
Feet details (and yes matching nails!)

I never know exactly how the face is going to look until she’s stuffed and the hair is. She melts me!

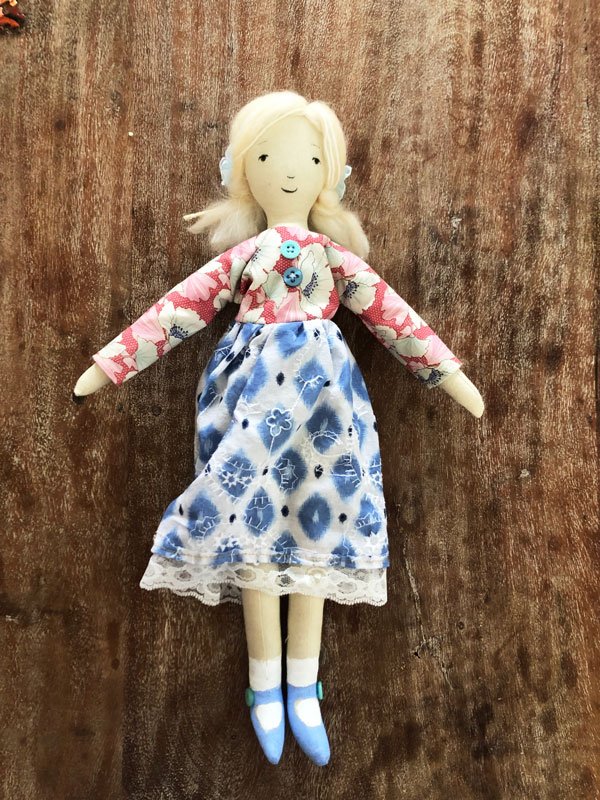
On this doll below, I love how the form of the shirt is still visible. You can see some of the seam and a button from the cuff on the right side of the doll’s skirt.

Lace and beaded floral accents below.

I’m not sure when I’ll be able to give these dolls to my aunts in person but this will give them time to decide who gets which!!! Kathy, Myra, Susie, Anna and Mary… I love you and a hope these dolls reminds you of your kind and God fearing Mum. She will be missed.

Living Canvas Collection: Rainbow in Pastels

Pastels make my heart melt. When I found this rainbow jelly roll at my local fabric store, I had to have it. I had no idea for WHAT but I bought it anyways.

I was so inspired, I painted my nails to match. That’s what LIVING CANVAS is all about, letting my art spread to all areas of my life, in whatever way it feels good.

So I quilted. And I can’t really tell you what a silly delight it was to sew with matching nails, I was giggling out loud! Listen, my machine had some severe issues as you can see below, is there any project that doesn’t have some DRAMA along the way!? If you’ve managed any creative project that went smooth start to finish, please write me.

I ended up removing one of the kelly green colors from the pack, I wanted a softer rainbow. This roll also did not include red, for this look that kept the intensity of the colors duller. Because this is one of the first quilts I’d done, I decided to do a combination of hand stitching and machine work to baste the fabrics. Hand stitching was the MOST enjoyable experience, it reminds me of the control you need to draw. I got lost in meditation making one stitch at a time. Had to go with rounded corners as I can’t get enough of that look.

The binding. I picked something cheerful for the edges. These tiny stitches are to die for. There’s something special about this kind of detailed work. While the stitches are small, it provides strength to the edges that will be tugged on. While I have recently learned how to do this on my machine, the look of this is so nice it’s worth the time and after working each stitching myself, I’m confident it will last.

Another look at that binding. Going with a neutral pattern on the edges tones down the wildness of the rainbow.

Below shows you the finish after the “great wash” that produces all the yummy quilt-y wrinkles. Evan had to hold this one up to be able to capture its length. It’s a great size quilt for one or for two who love to be close. <3 A few bits of dirty laundry on the floor for ya to keep me humble.

I leave you with words from Dolly, “The way I see it, if you want the rainbow, you gotta put up with the rain.”

Ain’t that the truth.

-Kirbi